Publishing Umbraco 13 to Production
Overview
In this blog we will try to cover some of the recommended steps that should be taken when publishing Umbraco 13 based website to production. The official documentation does have lot of parts covered, but there are a few gaps which we wish to cover in this blog.
We are using the Umbraco The Starter Kit [ https://docs.umbraco.com/umbraco-cms/tutorials/starter-kit ] as the base project for this blog post.
Project Setup
Assuming you are using Visual Studio 2019, clone the source for The Starter Kit project from Github site [ https://github.com/umbraco/The-Starter-Kit/tree/release-13.0.0 ] (ensure you use the Release Tags feature to select the right version of the source code you wish to use.). Set the Umbraco.SampleSite.Web project as the start-up project in Visual Studio and run the solution and run the project.
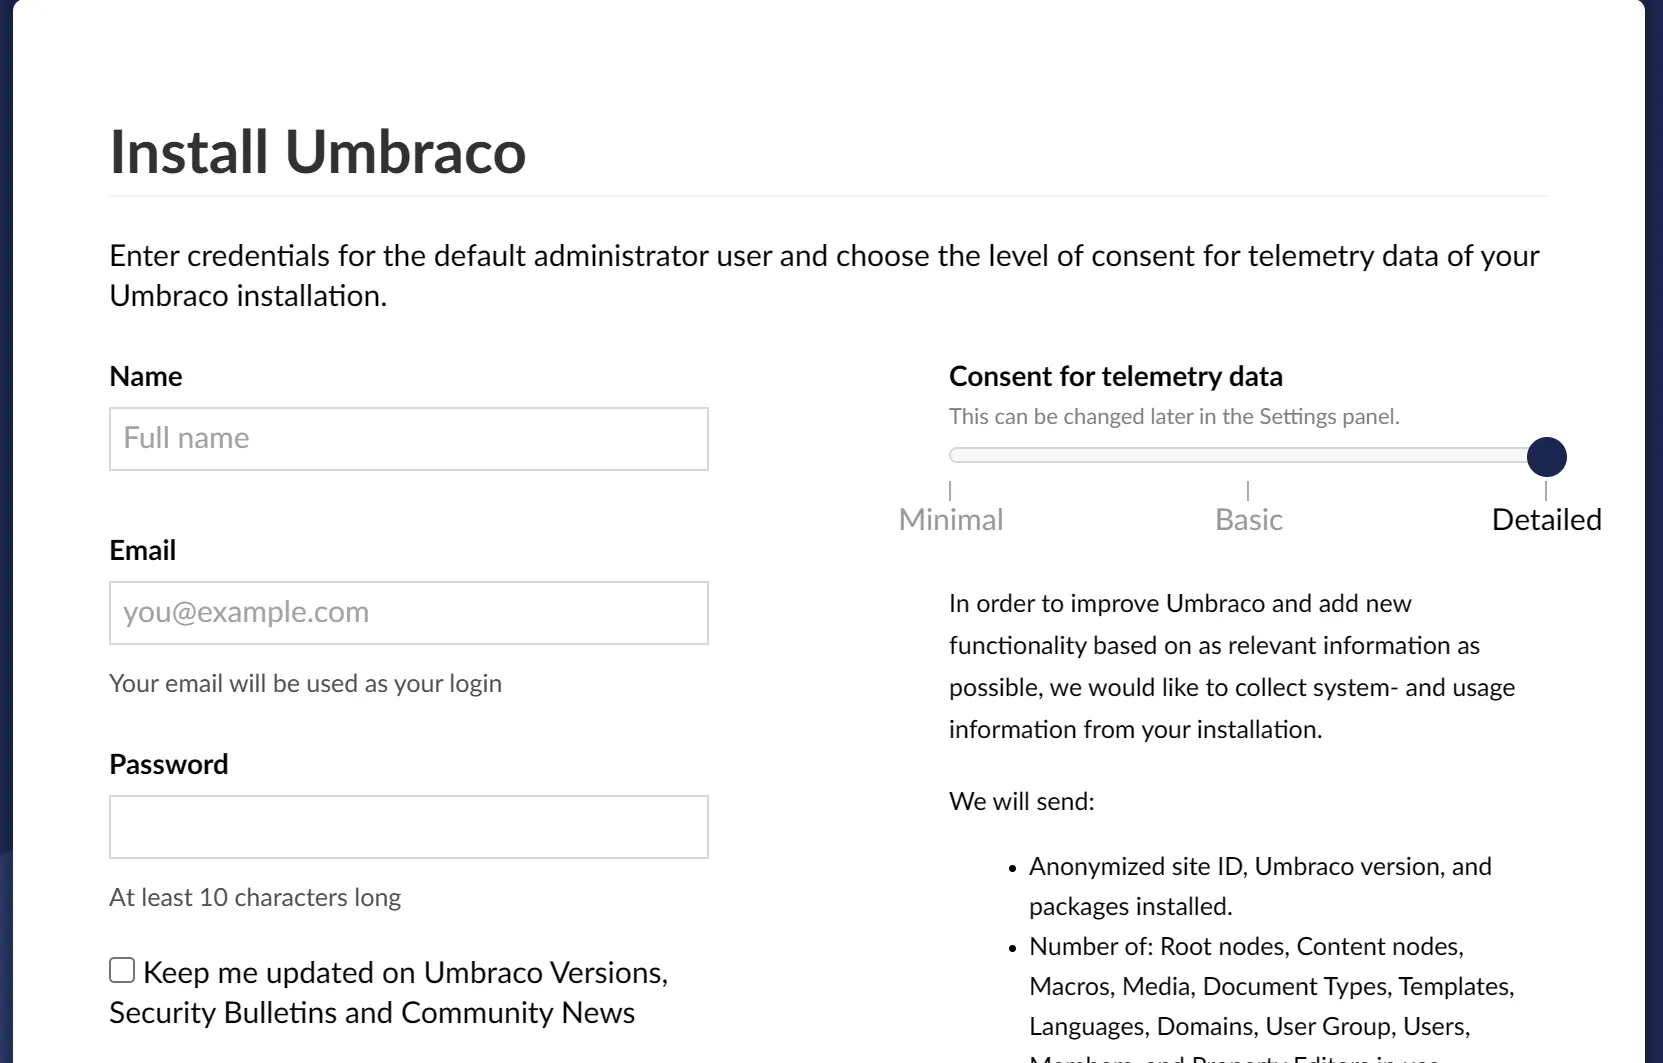
Figure 1: Install Umbraco
The first time you run the project Umbraco will ask you standard questions to setup username and password and click Next to complete setup and run the site. We are going to stick with the standard Stater Kit for the purposes of the blog.
Preparing for Production
-
Add appsettings.Production.json settings file
Add the appsettings.Production.json settings file if not already added to your project in Visual Studio. This settings file will have the settings needed for the production environment. Umbraco documentation [ https://docs.umbraco.com/umbraco-cms/fundamentals/setup/server-setup/runtime-modes#production-mode ] does provide good guidelines to setup the production settings to prepare Umbraco for production environment. There is also detailed docs provided for all the settings at[ https://docs.umbraco.com/umbraco-cms/reference/configuration ]. We are picking the settings which seem most relevant to productions environments.
The Connection string should be updated to point to the prod database, if hosted on the cloud, Key Vault or similar secrets services can be used to store the conection string securely.
{
    "ConnectionStrings": {
    "umbracoDbDSN": "Server=production-server;Database=UmbracoProductionDB;User Id=username;Password=password;"
    }
}
Logging: Adjust the Logging levels for production to limit the size of the logs.
{
  "Serilog": {
    "MinimumLevel": {
      "Default": "Information",
      "Override": {
        "Microsoft": "Warning",
        "Microsoft.Hosting.Lifetime": "Information"
      }
    }
  }
}
Umbraco Specific Settings: Configure Umbraco for production use and optimize for production caching. It is important to set the Runtime setting to Production to ensure proper caching fromthe CMS.
{
  "Umbraco": {
    "CMS": {
      "Hosting": {
        "Debug": false
      },
      "RuntimeMinification": {
        "UseInMemoryCache": true,
        "CacheBuster": "AppDomain"
      },
      "Runtime": {
        "Mode": "Production"
      },
      "ModelsBuilder": {
        "ModelsMode": "Nothing"
      },
      "WebRouting": {
        "DisableRedirectUrlTracking": true
      }
    }
  }
}
Update the Production site URL as well as SMTP server settings.
-
Database Selection
The Starter Kit uses SQLLite database, so that it does not need any additional Database engine. SQLLite is wildly popular and can also be used in production for smaller websites. It simplifies the deployment and saves cost of hosting a SQL Server database. Although if you are going to host a popular CMS with a large number of visitors it may be best to migrate the database to SQL Server. There are several tools like [ https://erikej.github.io/SqlCeToolbox/ ] which can help in the migration of the database. In case you decide to migrate the database, make sure you update the appsettings.Production.json settings file to have the right connection string to the production database.
-
robots.txt
Update your robots.txt file to allow or disallow search engine crawling as appropriate for your production site.
-
Publish - Release Build
Publish the build in release mode for production deployment. A folder publish to manually transfer the files to the production server. Alternatively, we can directly publish from VS to Azure.